Lab 4: Svelte II (Layouts & Reactivity)
In this lab, we will learn:
- Advanced Svelte templating techniques
- How to avoid repetitive code via a global layout component
- How to leverage Svelte’s reactive statements and directives to build interactive user interfaces (UI’s)
Table of contents
- Lab 4: Svelte II (Layouts & Reactivity)
- Check-off
- Lab 4 Rubric
- Slides
- Step 1: Creating a layout for UI shared across pages
- Step 1.1: Creating a layout component
- Step 1.2: Adding a navigation bar to the layout
- Step 1.3 More robust nav bar routing with absolute URLs
- Step 1.4: Adding
target="_blank"to external links with ternary operators - Step 1.5: Using the
class:namedirective to add the current page class - Step 1.6: Moving CSS specific to the navigation bar to the layout component
- Step 1.7: Importing global CSS via the layout component (Optional)
- Step 2: Dark mode!
- Step 2.1 Setting up the look of dark mode via
color-scheme - Step 2.2: Adding the dark mode switch
- Step 2.3: Using
position:absoluteto place the switcher at the top right corner - Step 2.4: Bind color scheme to a variable with the
bind:directive - Step 2.5: Apply the color scheme to the
<html>element usingglobalThis - Step 2.6: Reading the color scheme from local storage
- Step 2.7: Saving the color scheme to local storage
- Step 2.8: Preventing Flash of Unstyled Content (FOUC) (Optional)
- Step 2.1 Setting up the look of dark mode via
- Step 3: Better contact form via url concatenation and the
on:submitdirective (Optional) - Cheat Sheet
Check-off
Asynchronous lab checkoff is no longer one-and-done. To receive a lab checkoff, please submit your work asynchronously by filling out this form. TAs will review your lab and post your grade. If you do not pass, you will be able to fix any issues and resubmit or receive help in an office hour until the deadline.
Lab 4 Rubric
To successfully complete this lab check-off, ensure your work meets all of the following requirements:
- Nav bar is implemented in a layout component
- Nav bar highlights the current page
- Github link in the nav bar opens in a new tab
- Nav bar does not throw 404 errors on first load
- Clicking on the theme switcher changes the color scheme of the site
- Theme switcher preferences are preserved on page refresh and tab close/reopen
Slides
Step 1: Creating a layout for UI shared across pages
In lab 3, we were still copy-pasting our nav bar HTML onto each of our pages. If we ever wanted to add a new page to our website, we would still need to update the nav bar in every file. Wouldn’t it be nice to just have to design the nav bar once, and make it appear on every page we create?
There are two ways to do this. We could create a Navbar component and import it and use it in every page. However, that would be quite tedious.
Never fear! There is actually a concept we have not yet covered called a layout component, or “layout” for short. A layout is a component that wraps every page with the same content, so it’s very useful for things like headers, navigation bars, and footers. Svelte distinguishes layouts from other components by their file name, which is +layout.svelte.
In fact, a larger website typically has multiple different layouts, many of which build on others. E.g. you could have a main layout for the whole website, and then a layout for blog posts.
But don’t we already have app.html for that? Note that app.html is not a component, so it does not provide any of the conveniences of components (expressions, scoping, etc.).
Let’s try it now!
Step 1.1: Creating a layout component
Create a new file called +layout.svelte in the src/routes directory. Put YOLO <slot /> as its only content and save.
<slot /> is a special element that is replaced with the contents of a component. In the case of a layout component, the contents are the page contents.
Visit your website. Do you see the text “YOLO” at the top of every page? If so, great, the layout works! Now let’s do something more useful with it. Delete the “YOLO”, so that just <slot /> remains at the end of the file.
Step 1.2: Adding a navigation bar to the layout
Now that we’ve made sure we hooked everything up correctly, let’s start porting our navigation menu. In your +layout.svelte file, copy over a <nav> component from one of your other pages. Your +layout.svelte file should now look something like:
<nav>
    <a href="." class="current">About</a>
    <a href="projects">Projects</a>
    <a href="resume">Resume</a>
    <a href="contact">Contact</a>
    <a href="your github link here" target="_blank">Github</a>
</nav>

<slot />
Just like how order dictates position in the HTML of webpages, the same applies to the HTML portion of Svelte files. In this case, because <slot /> renders the page contents, we want this to be ordered AFTER our nav bar and any elements we are adding to the top of our page. Keep this in mind as you build out pages to be conscious of where elements (including <slot />) should reside on your page.
Delete the code related to the old nav bar on each of your other pages. We won’t need our previously defined nav bar now that we are using Layouts.
Save and preview. You should now see your navigation bar in all its past glory.
Step 1.3 More robust nav bar routing with absolute URLs
…But not quite. You might notice two issues with your new nav bar.
First, back in Lab 3, you might have noticed that your nav bar had trouble clicking between the pages and got some 404 errors the first time you loaded your website. After refreshing, the errors disappeared.
Why does this happen?
There's a very sneaky reason for this behavior that has to do with how SvelteKit interacts with JavaScript under the hood. When your SvelteKit page first loads, the server sends plain HTML to the browser, and at this point the browser treats your links like any ordinary link on a webpage. So when you click a relative link likehref="contact", the browser builds the full URL by tacking it onto the end of whatever page you're currently on. If you're on /projects, it goes to /projects/contact, which doesn't exist. Once the JavaScript finishes loading, though (a process called hydration), SvelteKit takes over and handles link clicks itself before the browser gets a chance to. SvelteKit is smarter, so it knows that contact means /contact and not /projects/contact. This is why the errors only show up on that first load, and go away once the JavaScript has had a chance to hydrate. Second, notice how, as you click between your pages, your “current page” highlight has stopped updating! That’s because we manually set the class="current" attribute on the current page link. That was ok when each page had its own nav bar, but now the Layout component needs to know which page to set as the current page. We’ll address that in the next step.
We were using relative URLs before. For more robust nav bar routing, we will be using absolute URLs and Svelte’s built-in base path.
At the top of your +layout.svelte file, add a <script> section, and define an array of your pages as follows:
let pages = [
  {url: "/", title: "About"},
  {url: "/projects", title: "Projects"},
  {url: "/resume", title: "Resume"},
  {url: "/contact", title: "Contact"},
  {url: "https://github.com/kmorhun", title: "Github"},
  // add other pages here
];
You’ve just defined a variable called pages using the let keyword. pages is an array, where each element of the array is an object that has the keys url and title.
Then, import base by adding this line to the top of your <script>:
import { base } from "$app/paths";
base is a string that contains the base path of your app. When working in localhost, it’s just an empty string, but when your site gets deployed to YourUsername.github.io/your-repository, base will be /your-repository
The url for each page can now be expressed as base + p.url, where p.url corresponds to the url key of each of the pages you defined in your javascript earlier.
The + operator here is being used to join strings together — this is called concatenation. So if base is "/your-repository", and p.url is "/contact", base+p.url will be "/your-repository/contact"
Now you get to practice using Svelte’s {#each} control flow again. Replace your old nav bar with one that iterates through the pages variable and creates an <a> tag for each page in pages. The text of the <a> tag should be the title of the page, and the href attribute of the <a> tag should be base+p.url.
If you’re not sure what to do, try referring back to Lab 3!
Your nav bar should look and function mostly the same as before, but now you should never run into the 404 errors! For now, your Github page will no longer open in a new tab, and your current page will not have the proper highlighting. Let’s fix the Github link first.
Step 1.4: Adding target="_blank" to external links with ternary operators
Let’s add the target="_blank" attribute to links that start with http or https.
In the starting <a> tag, add the following line:
target={p.url.startsWith("http") ? "_blank" : null}
Be sure to add this line before the closing > of your <a> tag!
This is our first instance of a ternary operator in JS, or an expression that takes three arguments. This ternary operator is called a conditional operator, and it works like a short-hand for an
if...then...elsestatement.You read a conditional operator as
condition ? result if true : result if false. Here, we check ifp.urlstarts with the string"http", and if it does, we settarget="_blank". Ifp.urldoes not start with"http", we settarget=null.
Now your Github page should open in a new tab, and all of your other pages should change within the same tab!
Step 1.5: Using the class:name directive to add the current page class
Now to fix the styling for the current page (déjà vu?).
First, we need to import the $page Svelte data store, which contains information about the current page. To access it, add this to the top of +layout.svelte in the <script> element:
import { page } from "$app/stores";
A store is a special Svelte object that automatically updates whenever its value changes. The $ prefix before a store name is Svelte’s way of saying “give me the current value of this store, and keep it up to date.” In our case, $page.url.pathname will always reflect whatever page the user is currently on. Note that even though we use $page in expressions, we import it as page (without the $). $ usually indicates reactivity in Svelte, i.e. a value that when it changes, everything that references it updates to reflect the change.
Try it now: Add an expression anywhere in your +layout.svelte component to print out info about the current page as a JSON object:
{
  JSON.stringify($page)
}
It should look like this (make sure to remove it after you’re done):

Notice that we can compare $page.route.id with the url of each page to see if it’s the current page.
Now we need to highlight the link for whichever page the user is currently on. We’ll use the class:class-name directive, which adds the class-name class to an element only when a condition is true. Let’s try always setting class:current to true:
<a href={base + p.url}
    class:current={true}
    target={p.url.startsWith("http") ? "_blank": null}
>
    {p.title}
</a>
Now all your nav links should have the “current” styling! If you set class:current={false}, none of your nav links will have “current” styling.
There’s a subtlety here: for most pages, we can check whether the current URL starts with the link’s path. For example, if you’re on /projects/my-project, the Projects link should still be highlighted. But we can’t use that same logic for the home page /, because every URL starts with / — which would make the About link always highlighted. So we treat the home page as a special case and require an exact match instead. The following code will add the class current to the link if and only if the condition is true:
<a href={base + p.url}
  class:current={p.url === "/" // is this link the home page?
  ? $page.url.pathname === (base + "/") // if yes - set current = true if the path name matches. Else, set current = true if the path name starts correctly
  : $page.url.pathname.startsWith(base + p.url)}
  target={p.url.startsWith("http") ? "_blank": null}
>
  {p.title}
</a>
The conditional operator is back! Let’s break it down:
p.url === "/"asks “is this link the home page?”. If it is, it uses a strict equality check: the current URL must exactly equalbase + "/"because usingstartsWithfor the home page would cause it to always be active (since every URL starts with/). If the link is not the home page, it falls through to the else case and usesstartsWithinstead, which means the link will be highlighted as “current” as long as the current URL begins with that link’s path (e.g./projects).We also could have simply used the
classattribute, but the code would have been a little awkward:<a href={base + p.url} class={p.url === "/" ? $page.url.pathname === (base + "/") ? "current" : "" : $page.url.pathname.startsWith(base + p.url) ? "current" : ""} target={p.url.startsWith("http") ? "_blank": null} > {p.title} </a>
At this point, you should have one nav bar on every page of your website, the current page should have special highlighting, and your Github link should open to a new tab.
Now, deploy your website. You’ll see that the GitHub link opens to a 404 Error page because your GitHub link is appended to your website’s base URL! This is because your link is always doing this:
<a href={base + p.url}
The GitHub link still works on localhost because on localhost base="", but this changes when you deploy. Fix this issue by replacing the href with a conditional operator such that the base is only appended before p.url if p.url does NOT start with HTTPS. It should look like this:
<a href={/*Put your conditional operation here*/}
Test on localhost and deploy to verify that your GitHub link takes you to your GitHub profile as intended.
Phew! That was a lot of setup. But now that we’ve done this, all it takes to add a new link to the nav bar is to add an entry to the pages variable in your <script>! That’s the magic of Layout components.
Step 1.6: Moving CSS specific to the navigation bar to the layout component
Just like with the <Project> component in last lab’s Step 5.4, let’s move the CSS that only applies to the nav bar to be within our +layout.svelte component by moving it from styles.css to the bottom of +layout.svelte in a <style> element.
Step 1.7: Importing global CSS via the layout component (Optional)
Another benefit that the layout gives us is that we now import our global CSS via the layout to apply to every page, which means that you benefit from Svelte’s hot reloading, i.e. the feature that updates your website when you save changes without you having to refresh anything. This replaces the need to link every stylesheet in app.html.
To make use of that, we need to move our style.css from static to src. Then, in src/app.html, we remove the <link> element referencing styles.css, since we’ll be importing it a different way.
Now, in routes/+layout.svelte, in the <script> element, add:
import "../style.css";
View your website and make sure everything works the same!
Step 2: Dark mode!
Now let’s learn about Svelte’s reactive statements by implementing a dark mode switch!
Step 2.1 Setting up the look of dark mode via color-scheme
First, we will practice some more CSS that will automatically adapt to the color scheme of our operating system (OS) and tweak our style so that everything looks good in dark mode.
CSS provides a color-scheme property that can be used to switch between light and dark mode.
color-scheme: light darktells the browser that the site can be rendered on either light or dark mode, depending on what the OS color scheme is. (Think of this like an automatic color scheme detector based on your computer’s settings)color-scheme: lightorcolor-scheme: darkforces a specific color scheme.
When color-scheme is dark (or light dark and the OS is in dark mode), you will notice several changes: The default background color will be a very dark gray instead of white, and the default text color will be white instead of black. We can actually access these special colors and use them in our CSS by using the canvas and canvastext system colors.
When applied to the root element (<html>), this property will already get your site very close to a proper dark mode. Try it now! Add color-scheme: dark or color-scheme: light to a :root selector in the <style> section of your +layout.svelte so that it’s applied on every page. Be sure to delete it after you are done adjusting your colors.
Adjusting the border color
While it doesn’t look too bad, in light mode we picked a border color that looked very subtle (oklch(80% 3% 200)
This is because its lightness is fixed to 80%, which means it does not adapt to the color scheme. One way to fix that would be to make it a semi-transparent version of a darker, slightly more vibrant color (e.g. oklch(50% 10% 200)
border-bottom-color: oklch(50% 10% 200 / 40%);
Since we’re using it in two places, you may want to define a CSS variable for it on <nav> and then use that instead:
nav {
  --border-color: oklch(50% 10% 200 / 40%);
	/* ... other styles and nested rules ... */
  border-bottom: 2px solid var(--border-color);
}
/* other CSS rules */
.current {
  border-bottom: 4px solid var(--border-color);
}
That should look about the same in light mode, and much better in dark mode.

Fixing the hover background color (optional)
If you did the optional hover background color in Lab 2, you may have noticed that it looks very bad in dark mode now.

That is because we defined that color with a fixed lightness (95%):
background-color: oklch(from var(--color-accent) 95% 5% h);
Just like our border color, it was very subtle in light mode, but sticks out like a sore thumb in dark mode. Worse, since the text color has changed, it is now illegible. Yikes!
We could fix that too by setting its lightness to 50% and increasing its chroma, then adding transparency. But here is another method.
We can make it a mix of the background color and the special canvas color:
background-color: color-mix(in oklch, var(--color-accent), canvas 85%);
This should now look a lot better:

Step 2.2: Adding the dark mode switch
We want our switch to have three states: Automatic (the default, adapts to the OS color scheme), Light, and Dark. The heavy lifting is already done in the CSS, so all the switch needs to do is set the color-scheme property appropriately on the root element.
Since we want this control on every page, we will add it to +layout.svelte, like the nav bar! That way, you also don’t have to add it manually on every single page.
First we need to add the form controls for selecting the color scheme. A good option is a <select> element (plus <option> elements inside it), which creates a dropdown menu. We wrap a <label> around it with a class (I used color-scheme-switch) so we can style it in our CSS. Putting it all together, we can add something like this above our nav bar HTML to add our dropdown switch to each page:
<label class="color-scheme-switch">
    Theme:
    <select>
        <option value="light dark">Automatic</option>
        <option value="light">Light</option>
        <option value="dark">Dark</option>
    </select>
</label>
For the value attribute of your <option> elements, we use the actual values each option should set the color-scheme property to (light dark, light, dark), so that we don’t need to convert the values.

Now we have a nice dropdown to switch between light and dark mode, but it looks a little awkward and nothing happens when we click on it right now. In the next few steps, we will position the switcher at the top right and use reactive statements in svelte to make the theme actually change!
Step 2.3: Using position:absolute to place the switcher at the top right corner
Rather than laying out with the rest of the content, we want the switcher to always be at the top right corner. We will do that via CSS absolute positioning.
- First, we apply
position: absoluteto our switcher (the<label>element with thecolor-scheme-switchclass) Notice that this took the element out of the normal document flow, and it’s now on top of the content. - We specify offsets from the top and right edges of the document with
topandrightproperties. I used1remfor both but you may want to use a different value (experiment with the dev tools and see what looks good to you). - Lastly, we want to ensure the label and switcher are next to each other on one line rather than vertically stacked. We can do this by setting our
.color-scheme-switchclass to have adisplay: inline-flexand adding agapbetween the elements (I used4pxbut feel free to use any amount that looks nice to you).
You’d probably also want to make the font a little smaller (I used font-size: 80%) to make it less prominent. You may also want to inherit the font-family from the parent, otherwise the browser applies a different font to form controls (you can just add select to your existing input, textarea, button rule in your style.css from Lab 2)
Step 2.4: Bind color scheme to a variable with the bind: directive
We now have all the UI in place, but nothing happens when we change the theme. Time to bring it to life with reactive statements in Svelte!
In the <script> element of your layout component, add a variable to hold the color scheme. Let’s call it colorScheme:
let colorScheme = "light dark";
The next step is to bind the colorScheme variable to the value of the <select> element.
In this context, bind means that the value of the variable will be automatically updated when the value of the <select> changes, and vice versa.
To do this, we use something called a bind:value directive on the <select> element and set it to {colorScheme}. We want to replace our current <select> element in our theme switcher HTML to the Svelte syntax for directives, which is very similar to attributes:
<select bind:value={ colorScheme }>
This binds the value property of the <select> element to our colorScheme variable. In fact, it does what is called double binding: the value of the variable will be updated when the value of the <select> changes, and the value of the <select> will be updated when the value of the variable changes.
Ensure that it works by printing a {colorScheme} expression above the <select> so you can see the value of colorScheme in plain text. It should change each time you select “light”, “dark”, or “auto” with your selector. Once you have ensured the value changes properly, you can remove that variable so the page doesn’t print it anymore.
Step 2.5: Apply the color scheme to the <html> element using globalThis
We have already seen how to use curly bracket expressions (i.e. { ... }) to set attributes or element contents based on variables or expressions. But here, we need to set a CSS property on the root element (<html>), which is not part of the Svelte component tree. If you recall, the <html> element is part of the skeleton in src/app.html, which is not a Svelte component and thus, cannot take expressions. What to do? Is it even possible?!
Fear not, of course it is! In fact, there are multiple ways to do this. You will find the the most straightforward one below, but feel free to ask about the others!
All of these predefined objects are actually properties of the global object, which we can access via globalThis, so we will use that reference.
In JS, accessing undefined variables produces an error, as we just saw. However, accessing undefined object properties on an object that exists does not produce an error; it just returns >
undefined. Accessing properties onundefinedornullwill also produce an error. To sum up, ifobjis an empty object ({}), and we have defined nothing else:
fooproduces an error (ReferenceError: foo is not defined)obj.foodoes not produce an error, it just returnsundefinedobj.foo.barproduces an error (TypeError: Cannot read property 'bar' of undefined) When accessing properties of objects of …questionable existence, we can use the optional chaining operator?.instead of the dot operator to avoid errors. To continue the example above,obj.foo?.barwill not produce an error, it will just returnundefined.
Therefore, we can have a variable to hold the <html> element by doing this in our <script> element of +layout.svelte:
let root = globalThis.document?.documentElement;
Note that globalThis does not need optional chaining ?. because it always exists, both in Node.js and on the browser. document only exists in the browser, so we need to add a ?. to prevent accessing the documentElement property from throwing an error in between the server starting and the document loading.
Now root will be undefined when Svelte runs in Node.js, but it will contain the object that corresponds to the <html> element when it runs in the browser. This means that we need to use the optional chaining operator ?. when accessing properties of root to avoid errors.
Therefore, to set the color-scheme CSS property, we need something like this:
root?.style.setProperty("color-scheme", colorScheme);
element.style is an object that allows us to read and modify the inline style (i.e. the style attribute) of an element.
Try it out: does it work?
Not quite! There is one last bit to make this work. The way we’ve written this, it will only be executed once, just like regular JS. To tell Svelte to re-run this every time any of its dependencies change, we need to use a reactive statement, i.e. we need to prefix that line of code with $:.
$: root?.style.setProperty("color-scheme", colorScheme);
If you try it again, the theme switcher should work!
Step 2.6: Reading the color scheme from local storage
Right now, every time the page reloads, the theme resets. We need a way to save the user’s choice and apply it automatically when they return.
We’ll use the localStorage object, which allows us to save key-value pairs in the browser. Unlike session storage, data in localStorage persists even after the page is refreshed or the browser is closed.
There are two parts to this solution:
1) Storing the User’s Preference Whenever the user selects a new color scheme, we save it to localStorage. This ensures that the last selected theme is stored in the browser.
2) Applying the Saved Preference on Page Load When the page loads, we check if a colorScheme value is stored in localStorage. If it exists, we apply it.
First, let’s read from localStorage to get the saved color scheme, if any.
let colorScheme = "light dark"; // default colorScheme value

if (localStorage.colorScheme) { // if localStorage has a colorScheme property
  colorScheme = localStorage.colorScheme; // override the default colorScheme
}
Options to make this less verbose
You can say the same thing multiple ways! Here is the same logic expressed with a conditional operator: let colorScheme = localStorage.colorScheme ? localStorage.colorScheme : "light dark"; And here is the same logic expressed with a nullish coalescing operator: let colorScheme = localStorage.colorScheme ?? "light dark"; However, if you try this code in Svelte, you will get an error. This is because, just like document, localStorage is a browser-specific variable that is not defined in Node.js.
We could use the same method as above, and access localStorage through the global object. However, that would get quite messy, so we’ll use a different method. We’ll specify a local variable that is set to localStorage if it exists, and to an empty object if it doesn’t. We can even call that local variable localStorage!
let localStorage = globalThis.localStorage ?? {};
As long as we place this before any attempt to access localStorage, we can now use the earlier localStorage lines as normal.
Step 2.7: Saving the color scheme to local storage
Reading from localStorage is only half the battle. We also need to save the color scheme to localStorage every time it changes.
Thankfully, that is pretty simple too. Our first attempt may look something like this:
localStorage.colorScheme = colorScheme;
However, just like Step 2.3, this will only be executed once. To tell Svelte to make this a reactive statement, we need to prefix that line of code with $:, just like we did in Step 2.3. Now, when you set the color scheme and then refresh your page (or close/open your tab), your choice should persist!
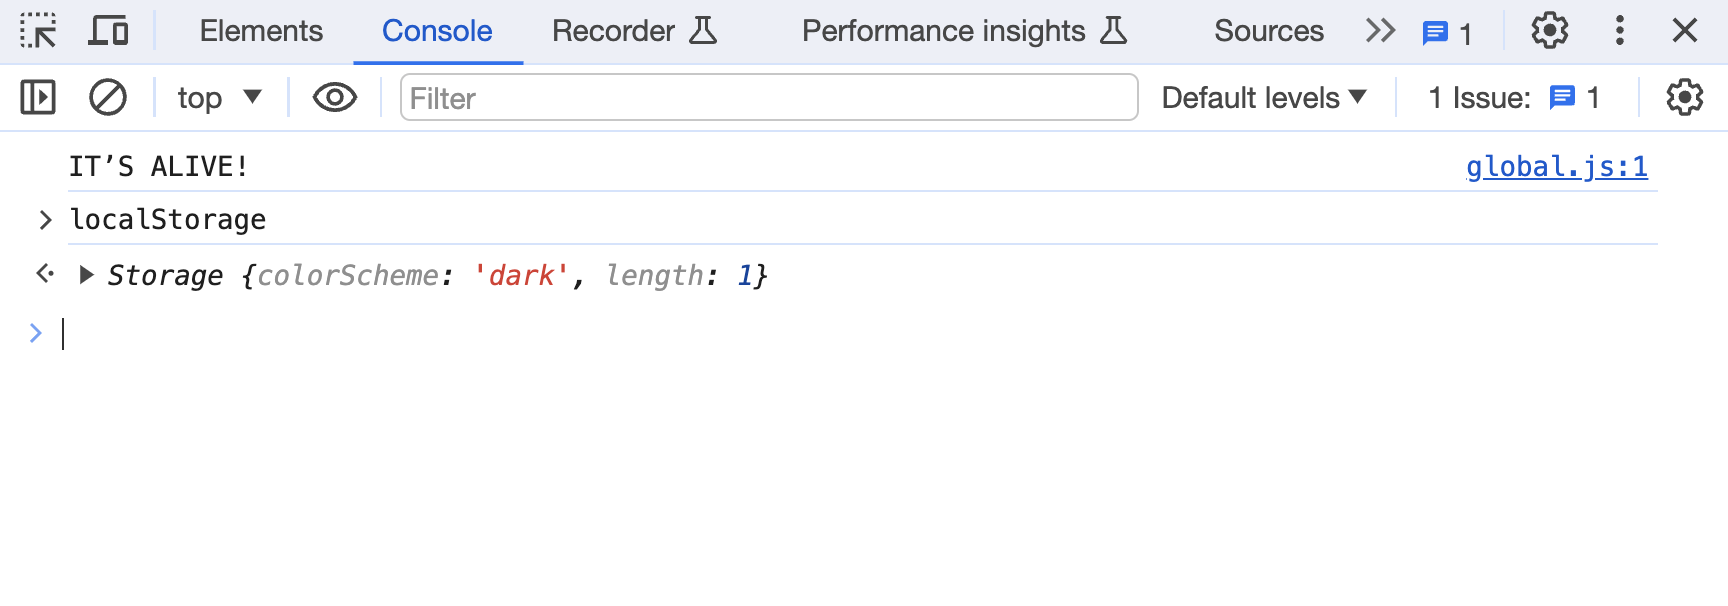
Beyond trying out the functionality, there are two ways to verify that your data has been successfully saved in the browser’s local storage:
In the Application tab of the dev tools, under the Storage section, you can see the localStorage object and its contents.
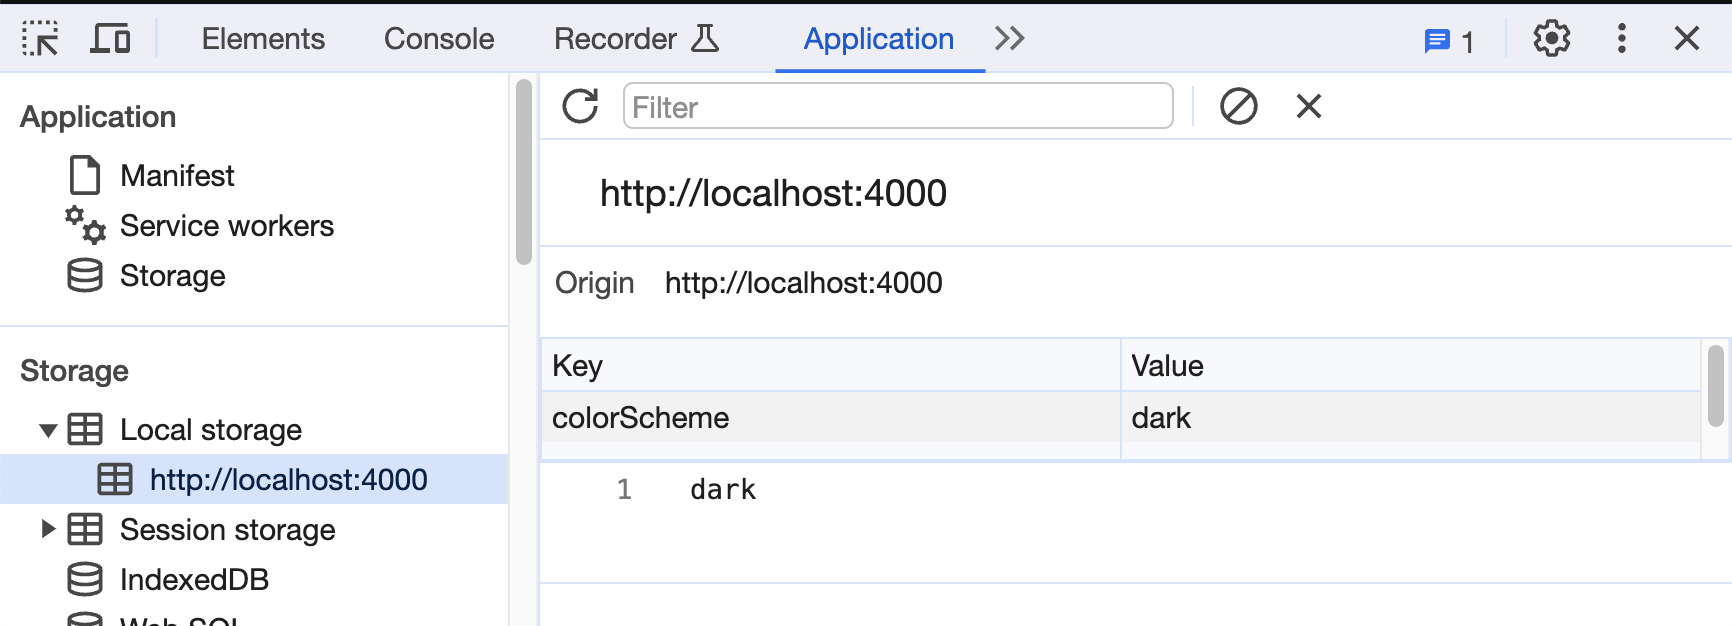
In the Console tab, you can type localStorage and see its contents.
Step 2.8: Preventing Flash of Unstyled Content (FOUC) (Optional)
You may have noticed that when you refresh the page, the theme changes after the page has loaded. This is because the theme switcher is only rendered after the page has loaded, and the theme is only set after the theme switcher has been rendered. This is called a Flash of Unstyled Content (FOUC).
To prevent this, we can set the theme before the page has loaded. We can do this by adding a <script> element to the <head> of src/app.html and setting the theme there. This script will be executed before the rest of the page is loaded.
<script>
  let root = document.documentElement;
  let colorScheme = localStorage.colorScheme ?? "light dark";
  root.style.setProperty("color-scheme", colorScheme);
</script>
Step 3: Better contact form via url concatenation and the on:submit directive (Optional)
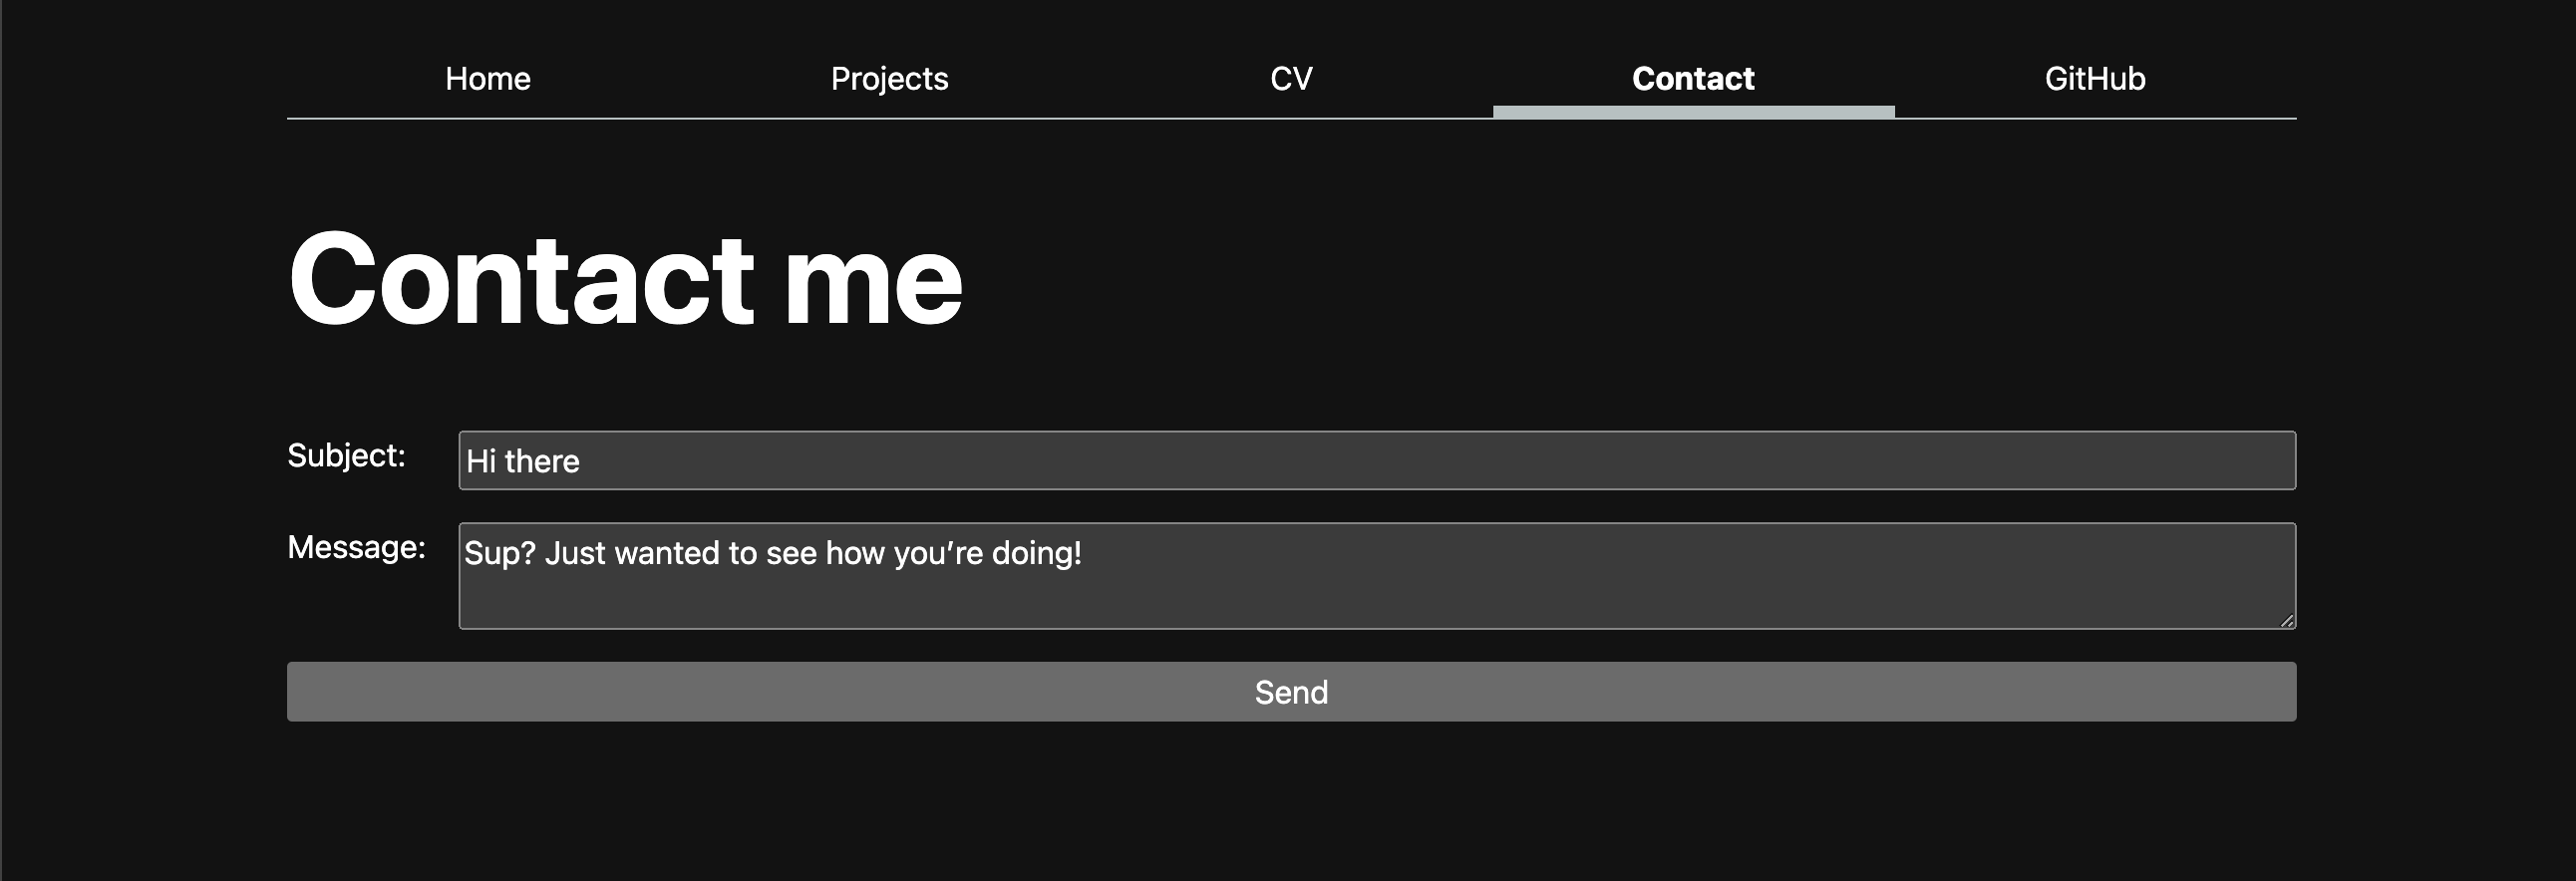
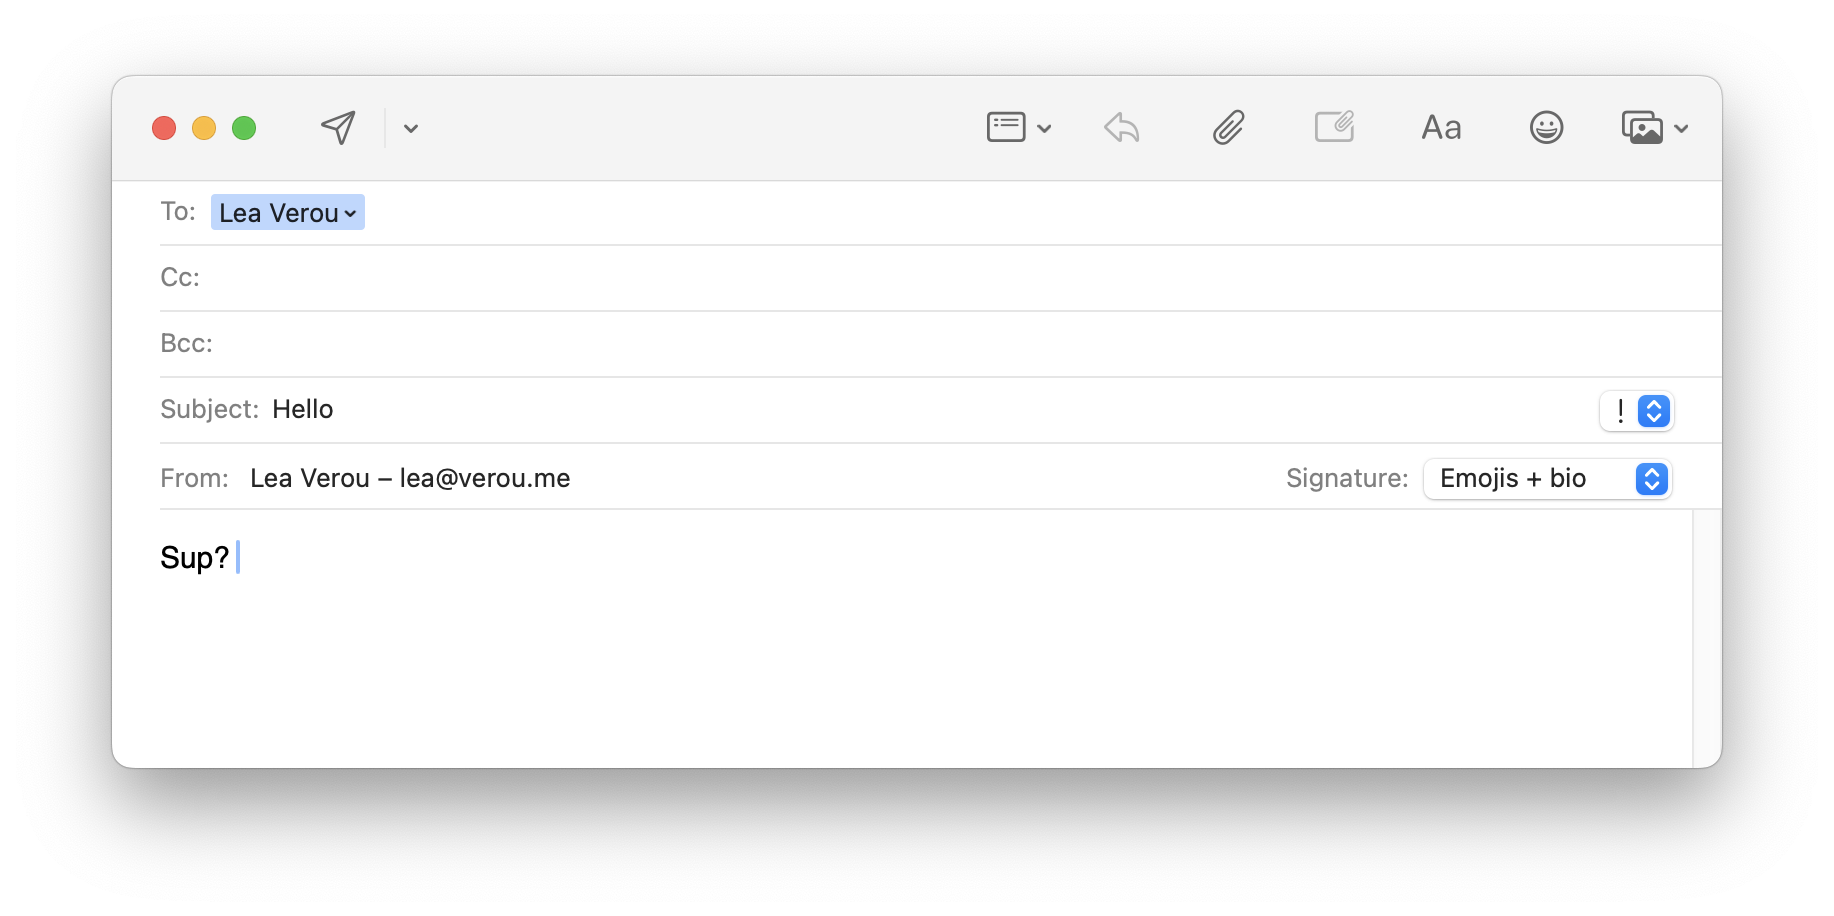
The contact form we made in Lab 1 works by building a mailto URL with the parameters we gave it.
Recall that we’re using method="GET" on our form. An HTTP GET request encodes all submitted information in the URL, so our form basically helps us build (and visits) a URL like mailto:leaverou@mit.edu?subject=Hello&body=Sup?. Try pasting that URL in your browser, and notice how it opens exactly the same window you’d get by submitting your form!
Let’s remove the “Email:” field that represented the sender’s email. Since this form opens a window in our mail client, and the email is sent from us anyway, it’s redundant.
So far, so good. But without JS, this has a fatal flaw. Try writing a longer subject and/or message that includes spaces and submit the form again:
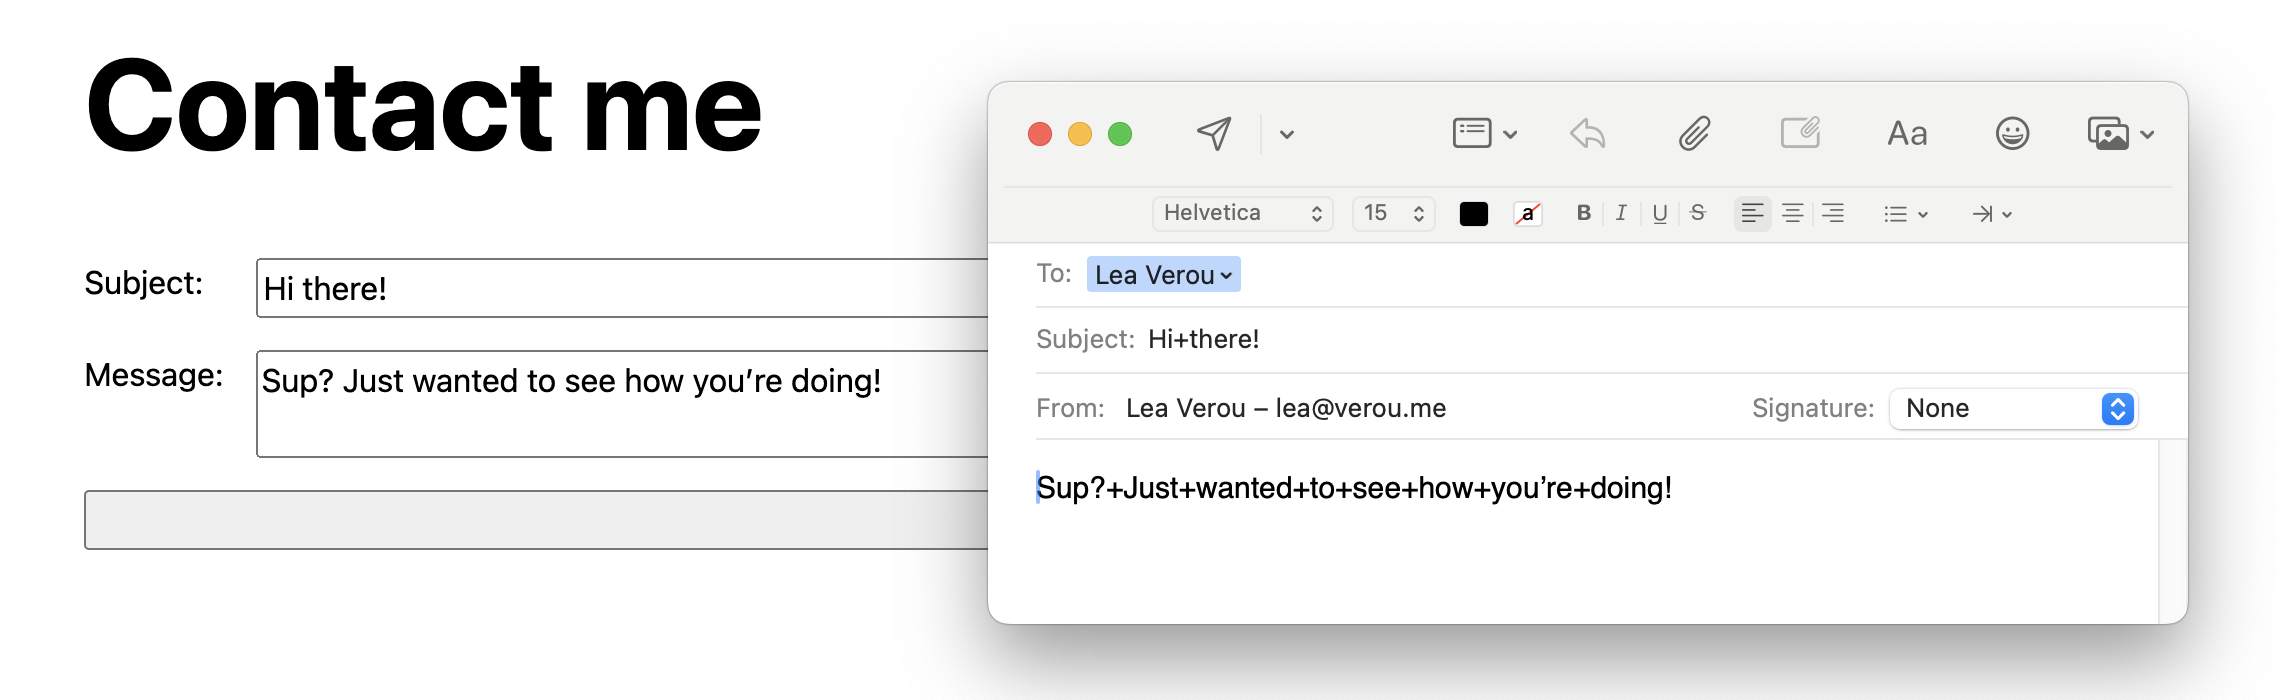
All our spaces have been replaced by + signs!
Why did this happen? When it comes to URLs, spaces are considered special characters and are not technically allowed. There are two ways to encode them: as + or as %20. The former is older and non-standard, but still widely used. However, not all clients recognize it (e.g. our mail client doesn’t!) whereas percent encoding (% plus a two-digit hexadecimal number, 20 for a space character) is the standard way and is always recognized.
Don’t see any + signs? Some mail clients (e.g. Gmail) automatically decode the + signs to spaces. However, you cannot have a form that only works in some mail clients and not others, so we need to fix this.
There is no way to fix this with HTML alone, which is why we did not use this method in Lab 1. But now that we know JS, we have superpowers! We will intercept the form submission, and build the URL ourselves.
To recap, our goal is to build the same URL, but with proper escaping this time. We don’t need to handle the escaping ourselves, that’s what the encodeURIComponent() function is for.
First, we need to tell our form to call a JavaScript function when it gets submitted, instead of doing its default behavior. In Svelte, we do this with the on:submit directive on the <form> element:
<form action="mailto:kmorhun@mit.edu" method="GET" on:submit={handleSubmit}>
on:submit is Svelte’s way of saying “when this form is submitted, run this function.” Here we’re telling it to run a function called handleSubmit, which we’ll define in our <script>.
Now let’s define that function:
function handleSubmit(event) {
    event.preventDefault();
    let form = event.target;
    let data = new FormData(form);
    // ...
}
Let’s break down what’s happening here:
eventis an object that the browser automatically passes to your function when the form is submitted. It contains information about what just happened — which form was submitted, where the mouse was clicked, and so on.event.preventDefault()tells the browser to stop what it would normally do when a form is submitted (in our case, building the URL and opening the mail client). We’re taking over from here and will do that ourselves.event.targetis the form element that was submitted. We save it to a variable calledformso we can refer to it easily.new FormData(form)reads all the fields in the form and bundles them up into an object calleddatathat we can loop over.
Now that we have data, we can build our URL. We start with the form’s action attribute (which is our mailto: address) followed by a ?, and then we’ll tack on each field one by one:
let url = form.action + "?";
The + operator here is being used to concatenate the strings together. So, if form.action is mailto:kmorhun@mit.edu, then url starts out as mailto:kmorhun@mit.edu?, ready for us to add the field names and values.
We can then iterate over submitted fields using a . of loop inside the event listener like this:
for (let [name, value] of data) {
	// TODO build URL parameters here
	console.log(name, value);
}
for (let [name, value] of data) uses a technique called destructuring. Each entry in data is a pair like ["subject", "Hello"]. Instead of writing entry[0] and entry[1] to access the two parts, destructuring lets you unpack them directly into two named variables — name and value — in one step.
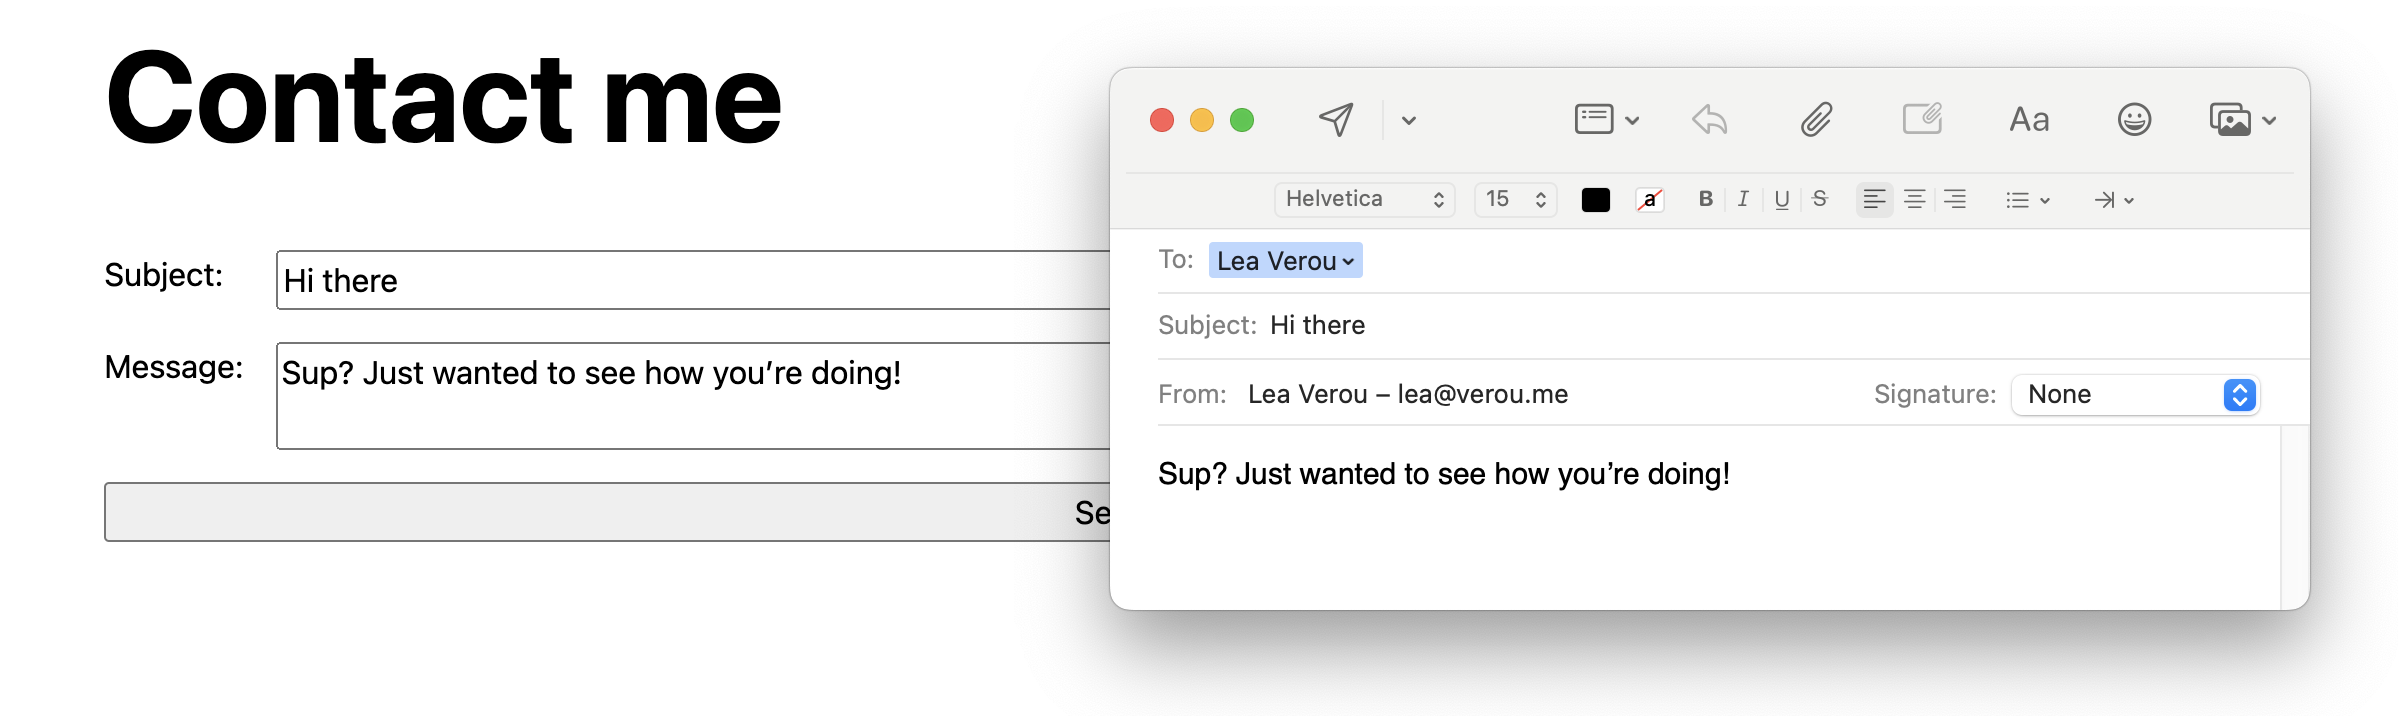
Save your work and submit the form. What do you see in the console? Now replace value with encodeURIComponent(value) and submit the form again. What changed? You should have seen your spaces in the message replaced with the encoded %20 instead!
We progressively build the URL by concatenating form.action, "?" and the names and encoded values (separated by =) for each field. We also separate each field with &.
The final url should look something like mailto:leaverou@mit.edu?subject=Hello&body=Sup? where mailto:leaverou@mit.edu is the form.action, subject is our first field name, Hello is our first field value, body is our second field name, and Sup? is our second field value. Note that the field names and values are associated using = and the name-value pairs are separated using &.
You can do something like this inside your event listener:
let url = form.action + "?";
for (let [name, value] of data) {
	url += (name + "=" + value + "&")
	console.log(name, value);
}
Once we have our final URL, we can open it via:
location.href = url;
For any other URL, this would navigate to another page, but because this is a mailto: URL, it will open our email client with the prefilled fields.
And now, your contact form should support messages with spaces in them!
Cheat Sheet
We covered a lot of ground in this lab. Give yourself a pat on the back! Here’s a summary of what you encountered this lab:
JavaScript
- Arrays of objects
- Accessing object properties with dot notation (e.g.
p.url,p.title) - String concatenation with
+ - Ternary operators
- Optional chaining operator
?. - Nullish coalescing operator
?? - Event handler functions (optional)
- The
eventobject andevent.preventDefault()(optional) event.target(optional)new FormData()(optional)- Array destructuring (e.g.
for (let [name, value] of data)) (optional) encodeURIComponent()(optional)location.href(optional)
Svelte
- Layout components (
+layout.svelte) - The
<slot />element - The
{#each}control flow block - Reactive statements with
$: - The
class:directive for dynamically assigning classes to elements - The
bind:directive for binding variable values to HTML elements - The
basepath - Importing from
$app/pathsand$app/stores - Svelte stores and the
$prefix (e.g.$page) - The
on:submitdirective for calling event handlers on Svelte elements (optional)
Web / Browser Concepts
- Relative vs. absolute URLs
- How SvelteKit hydrates pages and why it matters for routing
localStoragefor persisting data across sessions- The global object and how to access it in Svelte (
globalThis) - Flash of Unstyled Content (FOUC) (optional)
- URL encoding and special characters (e.g. spaces as
+vs.%20) (optional) - URL structure and query parameters (e.g.
?subject=Hello&body=Sup) (optional) - HTTP GET and how it encodes form data in the URL (optional)